Showing posts with label Knitting Pattern. Show all posts

Saturday, November 19, 2016

Patter Release: The Sea Star Beanie

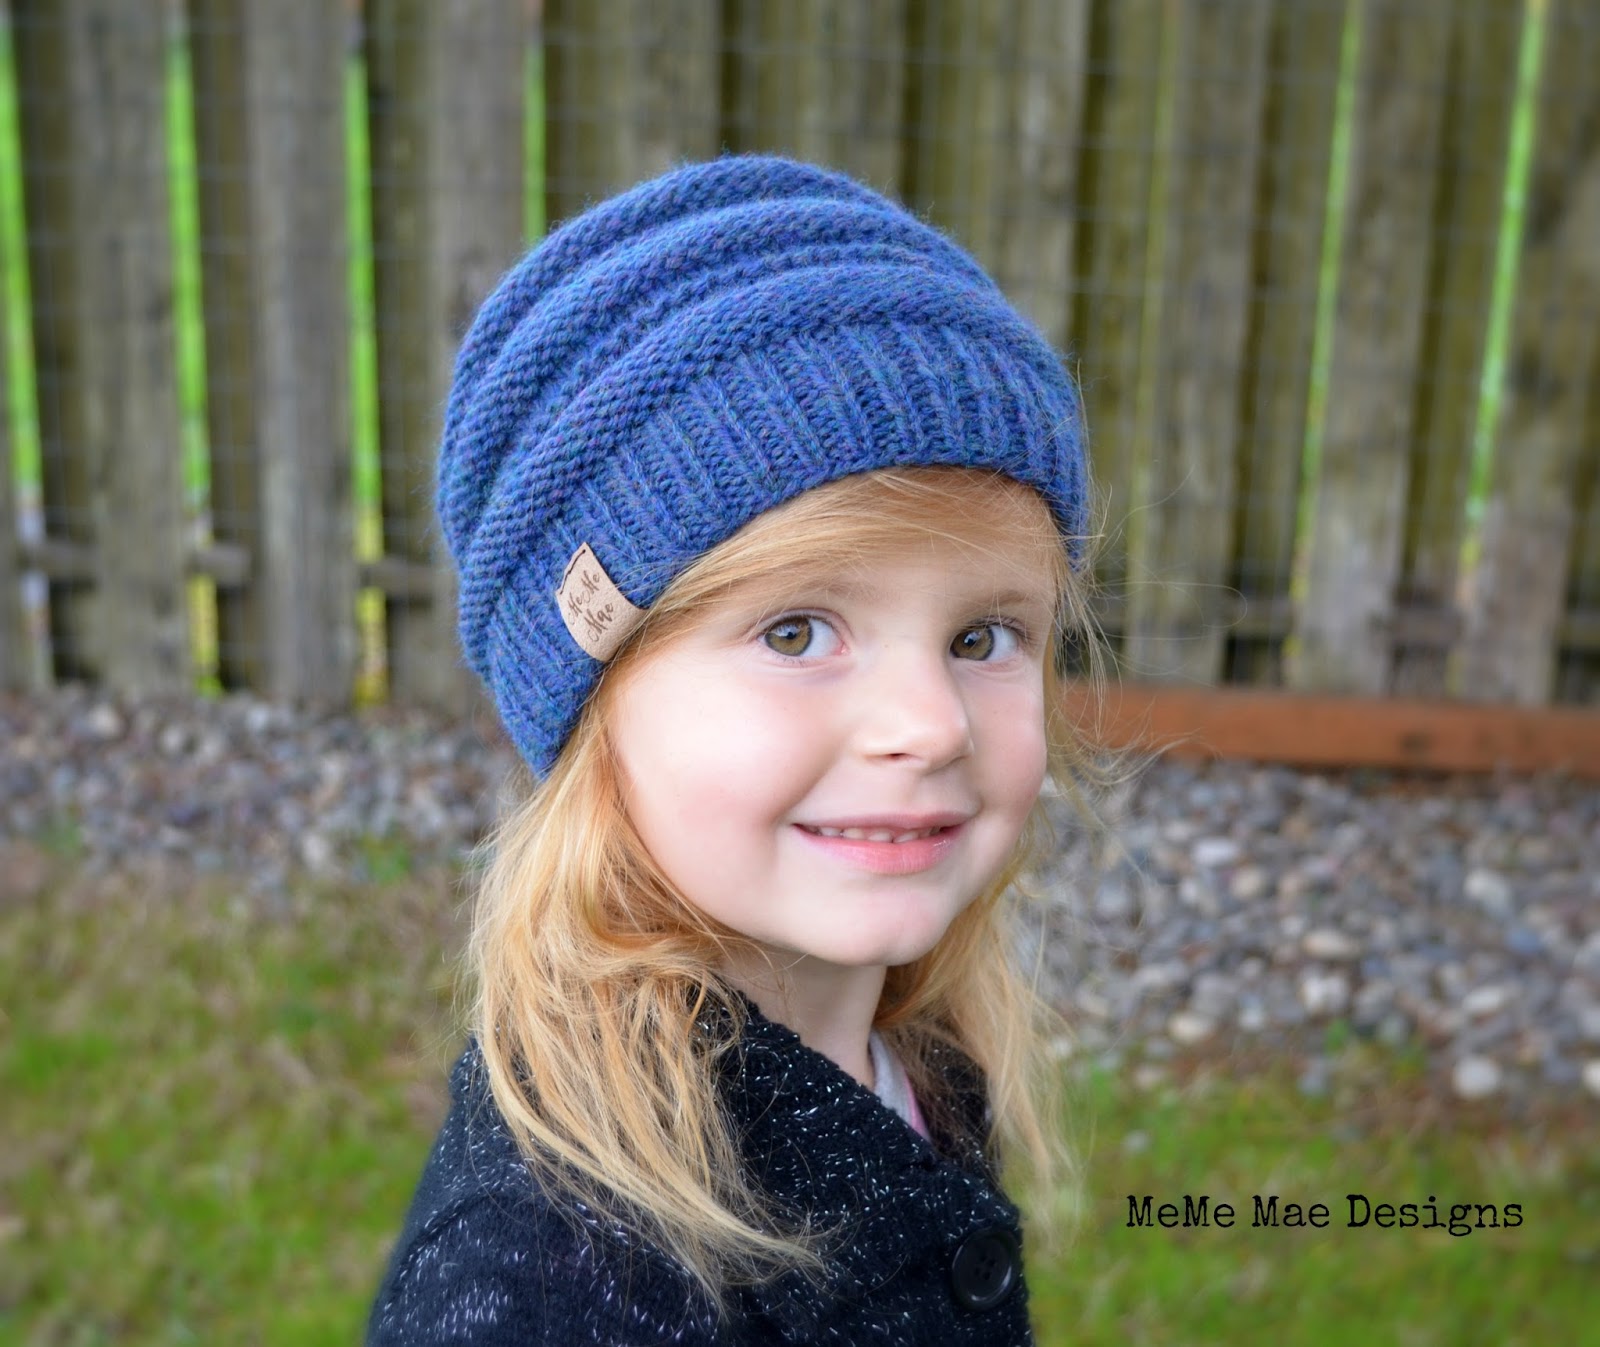
I am so excited to announce that I have released my twelfth pattern today: The Sea Star Beanie!!! It is available for purchase on Etsy, Ravelry, and Craftsy.


I am absolutely in love with the fit and texture of this beanie and plan on wearing it all winter long! Check out this top! <3


The pattern includes directions for four sizes [baby (6 to 12 mo.), toddler, child, and teen/adult], with tips on customizing the circumference further. I made this hat using Lion Brand Wool Ease, which is one of my top favorite worsted weight yarns!


Here are a couple of the pictures I received from my wonderful testers!!!

Melissa's (a.k.a. stillgonnashine) Aqua Beauty!
Yvon's Glorious Striped Version for her Darling Girl!

Seriously, I can't get enough of this hat! I see myself making many more in the future. Happy Knitting all!

Saturday, October 22, 2016

New Pattern Release: The Penny Pocket Scarf

It has been almost 4 months exactly since my last post and my last pattern release! Eek! It was a crazy summer and I am thankful that fall has brought a slower pace and more consistency to my days. And so far, I am even enjoying those rainy afternoons, snuggled up with a hot cup of coffee or tea reading a good book or knitting up my next project. :) And speaking of knitting, I am super excited to share with you my latest pattern: The Penny Pocket Scarf! It has just been released and is currently available on Etsy and Craftsy.


This pocket scarf is exactly what you think it is; a scarf with pockets! How fun is that????


Instead of worrying about losing those pesky mittens, just stick those hands in some cozy pockets. And seriously, kids LOVE the pockets! One of my tester's little girls put her stuffed animal friend in one of her pockets, which, in my book, gives this pattern a kid's official stamp of approval!


Pattern includes two sizes (adult and child) with two pocket style options (one that is more gender neutral) and a note on customizing the finished length. Overall, this is a fairly quick knit, especially the child size. I was able to knit the one pictured here using one skein of Lion Brand Wool Ease Thick and Quick (one of my favorite yarn staples!). I hope you love this scarf as much as I do!

Happy Knitting!


Saturday, May 21, 2016

NEW Pattern: Cable Banded Fingerless Gloves

I am super excited to announce that I have just released my 9th pattern: the Cable Banded Fingerless Gloves!!


I am pretty much in LOVE with this pattern! It has been my pet project for close to two months. The very first one I made was for an adult sized hand (using my hand measurements). I actually originally planned to knit them in the flat, but after sewing up the long seam on the first mock-up, I scratched that idea quick and rewrote the pattern for knitting in the round.

My far from glamorous shot of the first one knitted in the round.

The inspiration behind this cable band came from my last pattern: The Striped Cable Slouchy. I thought it would be fun to have coordinating accessories and I LOVE the cable band look. Here is a pic of my little model wearing both the gloves and slouchy.


It took me forever to draft the original size for smaller hands but thanks to the help of some friends with kiddos willing to give me hand measurements, I was able to tackle it. Hand sizes will obviously vary, and I know I could not make a size to fit every person perfectly, but in the pattern, I include a lengthy note for changing the circumference and adding length. I think this is a very easy pattern for intermediate knitters to customize. And my wonderful testers echoed that sentiment. Speaking of testers, here is a picture of Sweet T. Knits' (ravelry user tippyappleton) tester version. Aren't they gorgeous????

Sweet T. Knits

Overall, I am in LOVE with this new pattern and can't wait until fall football games to wear my matching slouchy and gloves! (Okay the sun has just returned after a long, gloomy winter, so maybe I can wait for a while.) :) The pattern is now available for purchase on Etsy, Ravelry, and Craftsy.

Happy Knitting! :)

Wednesday, April 13, 2016

Pom-Pom Tutorial

So I added a pom-pom to my latest pattern in the works: The Striped Cable Slouchy. This is my third hat pattern and the first one that I thought "Hey, a pom-pom might add a fun touch, especially for the smaller sizes."


When I went to look up some quick pom-pom tutorials to refresh my mind on how to make them, I realized there are a thousand different tutorials out there. There are ones using washers (which is how I remember my mom taught me), there were ones using forks (yes, forks and very clever), etc.

Because I didn't have any washers the size I needed (and because that method seems to take FOREVER) and because I knew the forks wouldn't give me the width I wanted, I finally decided to use a plain old piece of cardboard to create my pom-pom (this is definitely not an original concept I invented). Here is a quick tutorial (explanation) of how I made the pom-pom for the child size version of the Striped Cable Slouchy.


Materials

Cardboard
Worsted Weight Yarn of choice (the amount will depend on how thick you want to make it)
Scissors
Tapestry or Yarn Needle


Instructions

To begin, take your cardboard and cut a square the size you want the finished width of your pom-pom to be. For this pom-pom, I cut a 3"x3" square, which means my finished pom-pom would be 3" wide (or 3" in diameter). 


Next, take your yarn and begin to wrap it around the cardboard, from top to bottom. You will need to hold the first strand in place until you have wrapped enough yarn around to secure it. 


Continue to wrap the yarn around the cardboard until you get the thickness you desire (the thicker it is, the fuller the pom-pom will be). Be sure not to wrap it so tight that you will not be able to slip it off afterwards (which you will be doing). I wrapped mine until it was about 1/2 to 3/4" thick (on each side) in the middle and covered about 1" to 1.25" of the cardboard.


Once you have made your final wrap, gently slip the yarn off the cardboard, trying not to shift anything.


Take a long strand of the same colored yarn (around 16" or more) and tie it around the middle of your yarn bundle.


You want to tie it tight. I like to tie it tight once and then wrap it around again and pull a little tighter before double knotting it. Make sure you don't pull so tight that the yarn breaks (yes it can happen). Make sure to leave the tie strands long so you can use them to attach it to the top of your hat.Finally, take your scissors and cut the loops on both ends.


Fluff your pom-pom and trim around it if you see any uneven or long ends (but don't cut the two strands of your tie). You will have some fun yarn snow to sweep up! :)


Once you are done giving your pom-pom a fresh trim, use your tapestry needle to attach it to the top of your hat.


You are finished! Now sit back and admire your work! :)


Saturday, March 19, 2016

Free Knit Pattern: The Spring Flower Knitted Headband

Last week, our local Fred Meyer's had a killer yarn sale, and naturally, I had to stock up on some "essentials." If not for my mother-in-law alerting me to this amazing sale, I would have completely missed it! So a big thank you to her for saving the day! My husband was especially thankful to her for aiding in my growing yarn collection.... ;)

Anyways, as I was about to leave with my cart load of yarn, I spied some pastel-sparkly goodness at the end of the aisle, which turned out to be Red Heart's Boutique Twilight Yarn in Pixie (a perfect name for the sparkly confection). It instantly made me think of Easter/Spring and my two little nieces who I know will love the colors. Naturally, I put two skeins in my cart, planning to make them something out of it for Easter. What that something was, I wasn't sure of until a few days ago when I decided to make them a knitted headband with a crocheted flower. I am calling it the Spring Flower Knitted Headband.

Spring Flower Headband


It's a very simple and equally quick project, so I thought I would share the little pattern/tutorial with you here in case you wanted to whip one up for your little pixies just in time for Easter.

Side Note: The headband is knitted and the flower is crocheted.

Materials

~US 15 (10.00 mm) Size Knitting Needles

~US M (9.00 mm) Crochet Hook 

~(1) Ball of Red Heart Boutique Twilight Yarn in Pixie (You will be able to make around 4 or more with one ball)

~ A small amount of another coordinating Super Bulky yarn for the flower petals (I used Lion Brand Wool Ease Thick & Quick-Fisherman)

~Tapestry/Yarn Needle

~Scissors 

The Necessary Goods

Gauge

2.5 st. = 1", 4 rows (garter stitch) = 1"

Finished Dimensions

Approximately 2" wide and 12.5" in circumference (unstretched)

Headband Instructions

With size US 15 needles and Pixie yarn, cast on 5 stitches. (I use the long tail cast on method)

Row 1: Knit across

Row 2: Knit across

Repeat rows 1 & 2 (working in garter stitch-a.k.a. knitting every row) until piece measures approximately 12.5" long. The content of this yarn includes nylon, which makes it really stretchy. This size can stretch to fit snugly around my head. You may want to make it shorter for babies or small toddlers. If you can, knit to the length you think it should be and then test it out by wrapping it around the recipients head before casting off. Increase or decrease as necessary.

Cast off.

Bring the cast on and cast off edges together and sew the two ends to join and create your headband loop. Weave in ends.

The headband portion is finished! :)

Flower Instructions

To begin, take your Pixie yarn and your M crochet hook and create a magic circle. If you are unfamiliar with this, google "How to create a magic circle" and you will find some excellent YouTube videos that demonstrate this method. Basically, the magic circle helps eliminate or minimize the gap in the center of your starting round that tends to exist when creating a loop with the chain method. Alternatively, you can chain 3 and join the last chain to the first with a slip stitch to create a circle to work in. I tried this method as well and there was no noticeable gap. You can proceed below with either method.

Round 1: In the magic circle (or chain 3 circle), chain (ch) 1, make 3 single crochets (sc); join with slip stitch to first sc. (3 single crochets made)

Round 2: Ch 1, 2 sc in first sc and in each sc around; join with slip stitch to first sc. Finish Off but leave a long strand (to attach flower to headband later). This is the flower center. (6 single crochets made)

Round 3 (Petals): Join contrast yarn with slip stitch to first sc of the last round, ch 2, 1 treble crochet (tr), ch 2, slip stitch in same stitch. Slip stitch, ch2, 1 tr, ch 2, slip st. in next sc and in each sc around. Join with slip stitch to first slip stitch. Finish off. (6 petals made)

Assembly

Lay the headband piece down with the seam centered in the back. Position the flower on the front of the headband. I like to attach the flower off to the side of the front's center. (See picture below for placement)

Flower Placement

Using your tapestry needle and the Pixie yarn, sew the flower to the band. For this headband, I attached the flower by going up through the headband into the flower, poking my needle up between round two (the final round of the center) and round 3 (the petals), pulling the yarn up through.

Bringing the yarn needle between the center and petals.

Then I pushed the yarn back through between round 2 and round 1 and through the headband.

Bringing the yarn needle back down between rounds 2 and 3.

I continued in this way around the center circle until I felt it was secure. The sewn stitches should blend right in with the center, making them invisible and keeping things pretty! :) Fasten Off. Weave in all ends! You are finished!! I will update this post later with pictures of my nieces wearing their Spring Flower Headbands, but since they are an Easter present, they will have to wait. :)

I hope you enjoyed this tutorial. I would LOVE to see your headbands!! Please share them here or on Instagram using #accentsbymememae 

Happy Knitting (and Crocheting)!!! :)


Monday, March 7, 2016

Patterns, Patterns, Patterns...

I was quiet all last month, due to two colds, other crazy life happenings, and pattern designing! Up-to-date, I now have 5 patterns listed, and I am currently drafting pattern number 6! All 5 completed patterns are available on Etsy and Craftsy. I offer a bundle discount listing on Etsy. Today, I finally started setting up my account and pattern store on Ravelry! Currently, only the Button Up Cowl and The Striped Infinity Scarf are available there, but I am working to get the rest listed.

Here is a quick preview of the five patterns now available.

The Striped Infinity Scarf


The Cozy Cable Knitted Warmer

The Button Up Knitted Warmer


The Button Up Cowl

The Roll-o Hat

And that's the line up! :) More patterns coming soon! Happy Knitting!

Tuesday, January 19, 2016

Second Pattern Release: The Cozy Cable Knitted Warmer

I released my second pattern yesterday: The Cozy Cable Knitted Warmer. For over a year, I have been selling these in my shop and have always received positive feedback from happy customers. I actually released this pattern at the request of one of those happy customers. 


I only sell one size in my shop and it fits most individuals from the ages of 5 up to adults. However, for the pattern, I included directions for a toddler/child size, which I recommend for 2-4 year olds or any younger petite child.
 

The image above shows my 3.5-year-old niece modeling the toddler/child size and the image below shows my five-year-old niece modeling the adult size. 


The cozy cable knitted warmer can also be worn as a small neck warmer. Some of my customers have started wearing theirs this way and they love how soft and cozy it feels.


This is an intermediate level pattern, due to the cabeling required, but the cabeling is basic and nothing to fear. This warmer makes for a quick project. I can make one in just a little over an hour. You might find yourself making one for every day of the week or for all your family and friends.


The pattern is available on etsy or craftsy! If you make one, please share! I would love to see your work!


Monday, January 11, 2016

New Year, New Goals, First Knit Pattern

Hello to a new year, a new look, and a new (or renewed) determination to blog this year! Last year was such a busy year, with more home remodeling projects, new sewing endeavors, shop growth, and new adventures. This year my desire is to faithfully share the new projects of 2016 here, even if only for myself. I used to be an avid journal keeper as a teen, but in the techno world of today, blogging is a great way to record the memories and adventures of a year. 

Today I want to share with you my first goal of the new year, which I have, in part, already achieved or at least started. And that is pattern designing. When I first learned to sew, which was about 3.5 years ago, I discovered the world of PDF patterns. Thanks to them, learning to sew was such a quick and rewarding process. I never would have learned so quickly with store bought patterns that back then looked to be written in a foreign language. Anyways (fast forward to this past year), I more recently discovered PDF knit and crochet patterns. Knitting and crocheting were really my foundations for crafting, as I have been knitting since I was 16 or 17 and crocheting since I was around 10 or 12.

I have always been a pattern follower, never really daring to branch out on my own, until a few months ago when a friend first put the thought in my mind by asking me if the crochet project I was working on was my own pattern. When I responded by saying "no," they asked why I had never tried to make my own thing. My response was "I don't know," which was immediately followed by my own mental challenge of "Why not???"

Anyways, long story short, this past Friday, I released my first knit PDF pattern!!! The Striped Infinity Scarf!

The Striped Infinity Scarf

When I first sat down to draft a pattern, I thought I needed to come up with something great, something complex that would wow! And then it hit me that what people really want, at least I know it is what I often look for in a pattern, is something that looks "wow!" but is NOT complicated. It was from this thought that the Striped Infinity Scarf was birthed. For an expert knitter, this scarf could be made with closed eyes, but for the beginner or newbie knitter, this scarf is approachable and will produce the most satisfying feeling of creating something that looks "wow!" without the hair pulling.

Additionally, in this fast paced world, we all like instant gratification. We often don't have the time or patience to spend weeks on a project. That is why I love working with Super Bulky yarn! Projects go much quicker.

Lastly, though I love handmade items, I don't really like something I make to look "homemade" at least in the sense that it looks like something my grandma knitted me in the last century. Of course, that is not to knock such items! I love the history and unique beauty of those things; you just won't find me wearing them. So my goal with this scarf was to create a modern, chic look, hence the stripes and toggle button cuff addition.


When I look at the end result, I feel that I accomplished these three goals of simplicity, relative quickness, and fashionable style. Hopefully, you will agree with me on that. :)

The Striped Infinity Scarf pattern is available both on etsy and craftsy. If you purchase the pattern, I hope you will share your creations with me! The pattern gives instructions for both adult and child sizes, with notes on further size customization.

Thanks for following my first design journey. Another knit pattern will be releasing in about a week. My tentative goal is for two patterns a month. Now that I have written that I hope it will hold me accountable!

Happy Crafting all!