Friday, May 3, 2013

Wedding Gifts....

Oh the things you will sew! It seems I can't stop finding and coming up with new things to sew! I cannot believe I haven't even been sewing for a year. Is it this addicting for everyone else? Well since it has been too long since I shared a project, I thought it was time I gave you a glimpse of the first homemade wedding gift I have made and given. At the end of March, two of my childhood friends got married. The groom I have known since birth and the bride I have known since I was 10 and she was around 5 or 6. The wedding was small but sweet, and I saw a few people I had not seen in forever! Anyways, here are some pictures of their gift.

Here they are on display before I wrapped them up.
Here is a picture of the reverse sides.
I also made them some adorable matching coasters, as well (not pictured), using this tutorial for inspiration. I also printed some care instruction labels and tied a pretty bow around the finished products. I was pretty excited with how they turned out.

Monday, March 11, 2013

Reversible Placemats(My very first ever!)

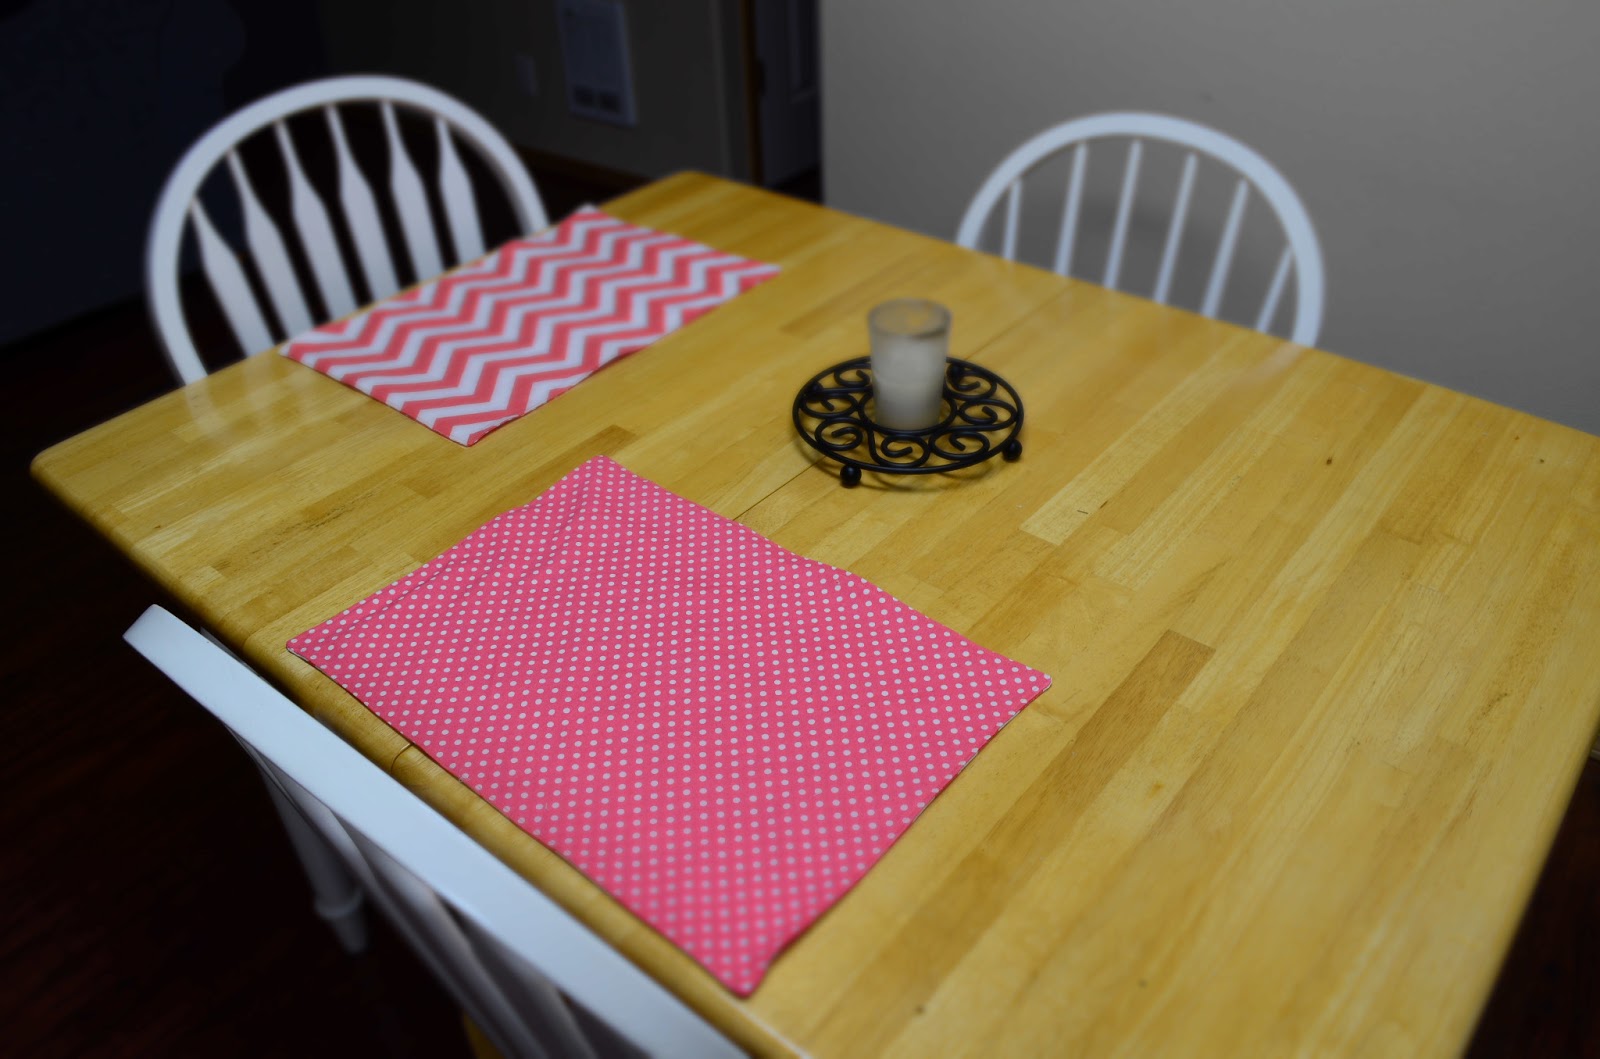
So this afternoon was a sewing first! I made a set of two reversible placemats. I have had this choral Chevron fabric laying around for some time now, and I recently purchased some polka-dot cotton print that is a close match in color. They were easy to make and turned out pretty well if I do say so myself. My mind has been spinning ever since about all the possibilities! Now I am looking at fabric with placemats in mind! Here are some pictures of my completed work on display. Enjoy! :)

Chevron Side!

So homey!

One of each.


Friday, March 8, 2013

Projects from 2012

Though it has almost been a month since I promised to post some pictures of the projects I have endeavored over the past several months, here they are at long last.

One of my favorite projects-Papa's shirt transformed into little girl's dress.

A matching head band. My own creation. 
Hello Kitty Dress! I made the ruffle skirt and attached it to the shirt.
The monkey bib. I am attaching bias tape for the first time! Yikes!
This bib project was my first time working with bias tape and of course, I attached it the wrong way or the cheating way. After this project, I read several tutorials on how to sew on bias tape. I am still learning to perfect it.

First skirt!
As I said in a previous post, my husband and I went to Hawaii in Nov./Dec. and before we went, I made this skirt to take along for the trip. It also happens to be the first skirt I have made for myself! I was quite pleased with how it turned out. I used a cotton print and the lightweight feel was perfect for sunny, hot days in Paradise.

Refashioned Jean skirt.
So I have had this mini-jean skirt for some time, but I do not care for mini skirts. So in an attempt to add length to the skirt, I attached two rows of eyelet ruffles. Kind of feel like a mermaid wearing this, so not really sure if it is "me".

Here is my first attempt at pajama bottoms, and they turned out so cute. I used this great tutorial and highly recommend it!

PJ's for my nieces!

PJ's for my cousin's boys!


PJ's for my cousin's girls!
The heart I stitched onto my cousin's girls' PJ's!
So a couple weeks before Christmas, I decided I wanted to make matching pajamas's for my nieces, my cousin's boys, and my other cousin's girls. I didn't have access to a pair of each of their pajama bottoms to trace for a pattern like shown in the tutorial I referred to above. But low and behold, I received an e-mail from fabric.com with a free pattern for making similar pajamas and the pattern had all the right sizes! I was so excited, and everything turned out great. Next time, however, I will decide to undertake a project like this earlier than two weeks before Christmas. I bought matching shirts from Fred Meyers for as little as $3-something. I monogrammed my nieces shirts but found out how difficult that was, so I added hearts to my cousin's girls' shirts. The boys I left alone. The pattern did not call for buttons, but I added them to the bottoms for fun. One of my cousins has said these are the most comfortable pajamas and so easy to put on. I used flannel from Jo-Ann's to make the bottoms.

Here are the PJ's already to be wrapped, and just in time!
Well this is just a sample of some of the things I made in 2012. I also made several cardigans but I don't have pictures of those.  Now here we are in 2013 and I have already completed many new projects.  I will try to bring you up-to-date on them....eventually. :)

Wednesday, February 6, 2013

Hello Again

I apologize for the long absence. With all the holidays, a trip to Hawaii (to celebrate a belated 1-year anniversary), and lots and lots of sewing, I have been negligent about posting. I am determine to do better. I find myself diving into one project after another and get so consumed with them that I fail to pause and take pictures. I have taken some pictures, so I will post some later to give an overview of  the projects I have been undertaking.

I should mention that my wonderful husband bought me a serger for Christmas. I am embarrassed to say that I finally used it for the first time a week and a half ago. I was so intimidated by the beast! Yes, it looks all docile but inside, it is a threading maze! Finally, though, I sat down and watched the DVD that came with it and read the manual and now I can successfully thread it (with the aid of the manual). Can I just say that everything I have read about sergers is true? They create an amazing seam and finish off edges so nicely! I still have much to figure out about my new machine but I am in love already. The machine came threaded with white thread, which was nice; however, white does not match everything, so I looked into purchasing some more thread. I tried Jo-Ann's, but I was very discouraged with how expense each spool was and I needed four of each color! So I did some research online and found this excellent place to buy the thread I needed: Wawak.com. I paid a $1.94 for each (you must buy four of one color to get this price or else they are a $1.99 for each). The more of one color you buy, the cheaper it is. I got four spools of six colors. I chose the colors that I would consider are the sewing staples: white, grey, khaki, blue, and black. I also chose a pink because much of the fabric I recently purchased has pink in it. Not only was the thread price great, the shipping price and speed are excellent. I was charged $4-something for shipping; shipping is free for purchases of $100 or more. Also, I ordered the thread Monday morning and it is scheduled to be here today! You can't beat that! 

Anyways, project pictures to come!

Friday, October 26, 2012

My Early Birthday Surprise! :)

Have I ever said my husband is wonderful?!?! Well he is and I should say it more often! He is wonderful for so many reasons, but right now, I want to acknowledge how wonderful he is for getting me my very own sewing machine as an early (a month early) birthday present! As I have said in past posts, I have been borrowing my mom's old Singer sewing machine. Now, thanks to my wonderful husband, I am the proud owner of a Singer 9960 Quantum Stylist. I was so excited when it arrived Tuesday night! I spent the whole evening reading the manual, just itching to sew something with it. I attempted my first project the next morning: these adorable baby Mary Jane shoes. (I promise to post pictures later of these adorable little creations.) The machine sewed like a dream. It does so many wonderful things! I think it will take me years to fully appreciate each of the 600 stitches and all the cool features. I can't wait to show you what I made on it last night (and finished today), but that will have to stay a surprise until another post. This post is about my wonderful husband! :)


There is Mr. Wonderful all ready for his game.

And of course, me with Mr. Wonderful!
 Click below to take a look at my baby, but beware, you might want one for yourself. 

SINGER 9960 Quantum Stylist 600-Stitch Computerized Sewing Machine

Friday, October 19, 2012

Cozy & Simple Baby Booties

I found the easiest pattern here to make little baby booties with three seams. You can make a set using one fabric quarter and still have fabric left over! Sorry, I didn't take pictures as I went along; however, the pattern provides pictures. I have made two pairs so far. Here is a picture of the first set I made.

These are the 3 to 6 month size.

Aren't they adorable? The only part I had trouble with was the third and final seem. The pattern calls for a zigzag stitch that goes off the right edge. I had trouble making sure both pieces were stitched, so there were no gaps. I probably just needed to cut better or line the pieces up better. It was easy to fix though. For the next pair I make, I might just stitch close to the edge but not off, and then trim some of the excess.

I made these little darlings for my youngest niece, Rihanna Rose.

Baby Feet = Adorable!
A perfect fit! I promise that I will take step-by-step pictures of the next pair I make. I am thinking about adding some cute buttons to the top. Also, I want to extend the size and make slipper booties for Hannah, Rihanna's big sissy.

Tuesday, October 9, 2012

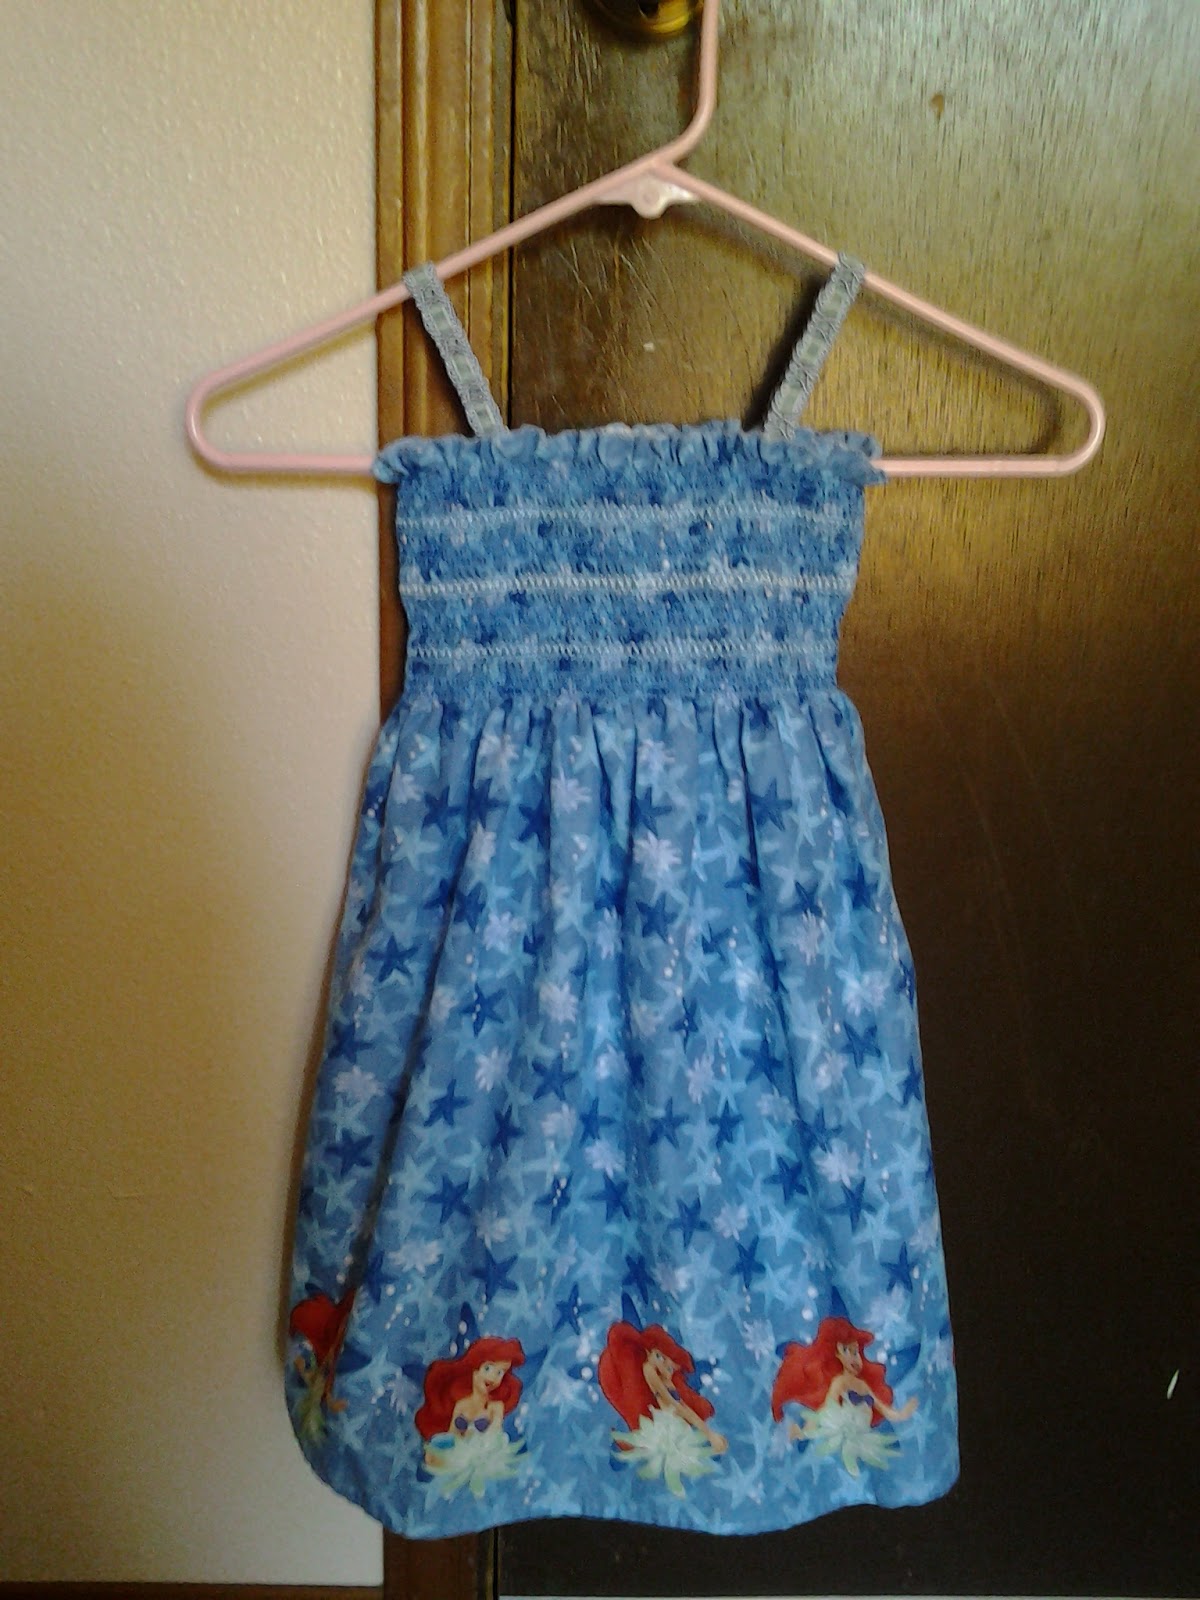
The Ariel Dress (Second Installment)

I must apologize for my delay in returning to the Ariel dress. First, I successfully finished it, invisible zipper and all. Second, my niece loved it and she looked adorable in it at her second birthday party. In the first segment I wrote on the Ariel dress, I showed how I made a lining for the dress and how I attached to the dress.  In this post I will share with you the completion of the dress, which included installing the invisible zipper, sewing up the back seam, adding a hook and eye clasp, and attaching the ribbon straps. I did not finish this all at once. I tackled the invisible zipper on a Saturday, along with sewing up the back seam. Then the next Sunday, I attached the ribbon straps. However, I had to reposition the straps after trying the dress on my niece (the straps were spaced too far apart that they fell off her shoulders). I added the clasp and eye hook when I repositioned the straps.

So installing the zipper...... On the afternoon I finally attempted to install the invisible zipper onto the Ariel dress, I realized there was no way I could use the zipper foot I had bought at Jo-Ann's. For some reason, I failed to notice that it was a Vertical zipper foot (this was written clearly across the top). I still really do not understand what a vertical zipper foot is and if I can even use it on my machine but that is for another day. After doing some online searching about zipper foots and installing zippers, I came up with this bright idea to use a regular foot. Some people online said that it was possible to do. Well after breaking my first needle (which thankful I had spares), I successful got the invisible zipper installed.

Pinning the first strip of the zipper.

Beginning my attempt to attach an invisible zipper with a regular foot...before the needle broke.

One side finished...Can you tell that I sewed as close to the teeth as I could?
Complete!

Practically invisible. :)

Sewing up the back seam.
Back seam completed!

Here are what the straps looked like after the first attempt.


Here is what they looked like after I repositioned them. On a side note, I do not recommend using this type of ribbon. It unraveled horribly and I really had to reinforce the stitches in order to keep them from continuing to unravel. I recommend plain ribbon or material. Still they were adorable.


Here is the clasp!

Here is the finished product on the birthday girl!


This was a fun project for me as a beginner. I learned some great skills, such as hemming, gather, and inserting an invisible zipper. Stay posted as I begin to share more about the projects I have completed since this.